data view
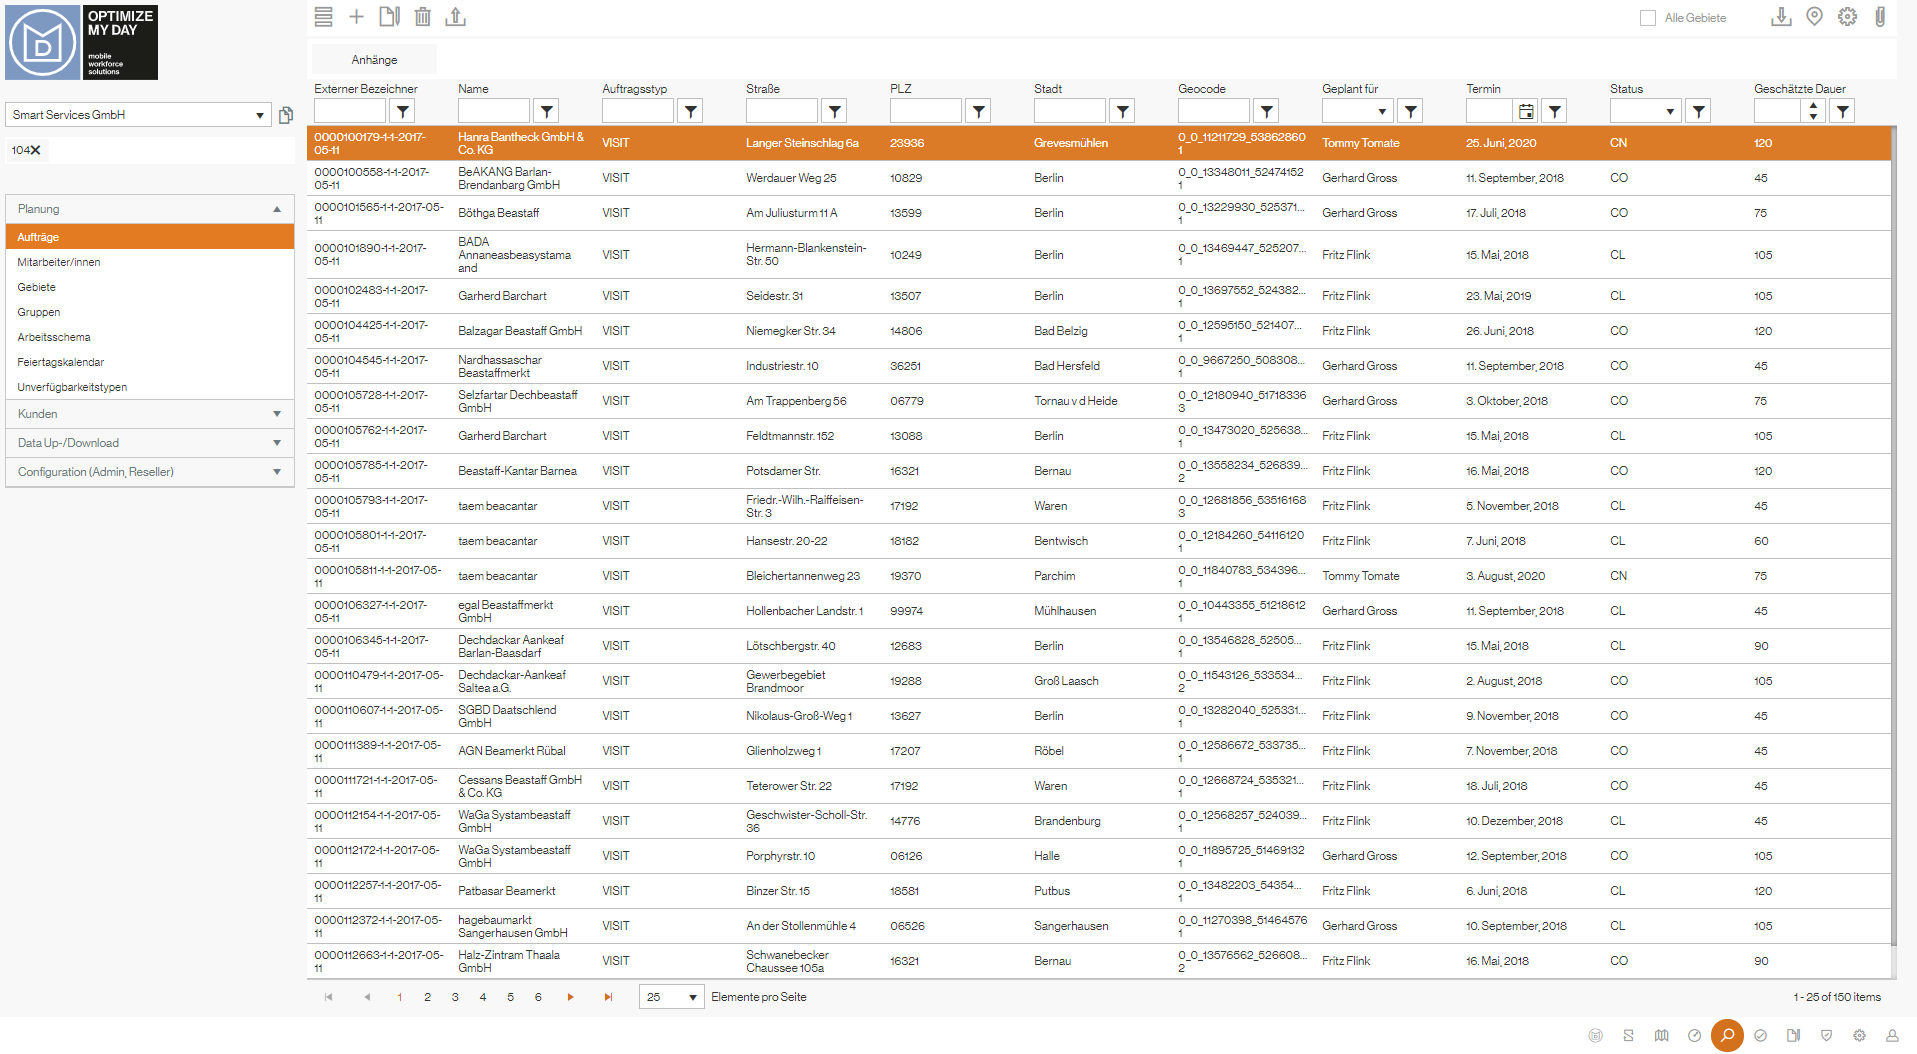
The data view enables the management of all master data within OMD Go. Here the user can view, create and edit master data such as employees, tasks, work samples, products and others. The menu on the left allows the user to switch between the individual entities.

After selecting an entity (e.g. tasks), the selected master data is displayed in a table. The table columns can be sorted (ascending and descending). In addition, you can search in the columns (similar to other spreadsheet programs) and filter the lists as required. The settings icon ("gear" symbol) in the upper right corner shows all available columns for the respective entity. The user can select and deselect the columns that he would like to see or that he needs for filtering and sorting.
The plus symbol enables the addition of a data record in the respective entity (e.g. adding an employee or a customer). Data records can be edited or removed using the right-click menu on a data record or the corresponding icons in the area above the table.
Excel upload
OMD Go offers the option of uploading master data (currently available for customers and tasks) using your individual Excel file. In this way, you can quickly and easily fill OMD Go with your master data and start planning immediately. The requirements for the Excel file are low, so that you can start quickly with any file.
You can start the upload functions (import customer data, import task data) from the welcome page in OMD Go or via the same icon in the table in the data view. An upload assistant will guide you through the process.
In the first step, insert your Excel file (using drag & drop or file selection) and press the upload button. Use the arrow button in the upper right corner to go to the next step of the assistant.
The field mapping takes place in the second step. In the second column, select the respective column of your file from the drop-down fields that matches the given OMD field. A preview of your table is shown on the right-hand side (in the second line of your document).
Some OMD fields can be stored with default values, if you do not have the relevant data for the OMD field in your file. Example "Area": If you do not work with areas and your table does not have a column for them, you can select the standard area of your configuration from the drop-down menu. All customers are assigned to this area when uploading.
The mandatory fields must be mapped, the optional fields are not mandatory.
If data records cannot be imported, you will receive a list of all exceptions at the end of the process.